

Small Brewery Equipment List–Planning Tips
Small Brewery Equipment List – How Many Brew Vessels?
This is one subject I chat about a lot, with potential clients opening a small brewery. It depends on the plans for the present and future, what the best option will be. Are you planning to start small; then looking to grow?
Or is the plan to have a small hyper local set up, serving the local community just pouring onsite?
If you’re looking to keep it small, and space is tight, then a 2-vessel system makes sense. It means you’ve more room for other things, for example extra tables.
1. Why a Two-vessel Systems Works…
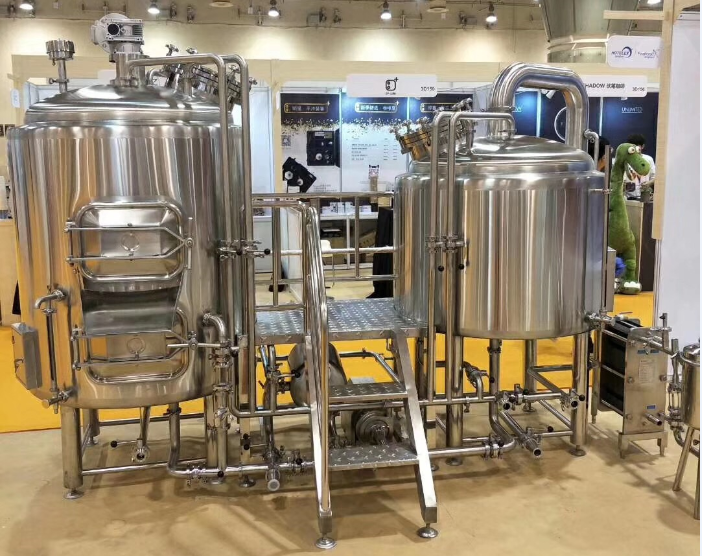
If a two-vessel system (combined mash/lauter tun and kettle/whirlpool) is properly designed. It can be both efficient and make good beer. The chances are brewery at the smaller end, 300-liters or under will be electrically heated.
With modern malts being so well modified, for the most part step mashing isn’t needed.
Yes, there are some times, when having the ability to step mash is preferable.
But these days with enzymes and alternative brewing processes you can achieve most of what you want for a beer, without needing to step mash.
A mash/lauter tun with good filter plates, allows for good wort collection to the kettle and brewhouse efficiency. A two-vessel system without mash tun heating, takes up less space and also cheaper to buy.
Three-Vessel Options
At 500-liters and above, a 3-vessel system may be the favorable choice. If there’s enough space plus, a brewer wants mash tun heating to give the ability to step-mash.
Furthermore, brewers who taste the beers like them, commenting all of the beers are to style. I hit my targets on this system, which I set out for all my brews. I sometimes, just have to be more creative in the brewing process.
Why 3-Vessel System? Small Brewery Equipment List
A 3-vessel system helps if you plan to grow in the future. It’s quicker and easier to brew double batches in one day with a 3-vessel system. You should also have a larger HLT (hot liquor tank) too.
The HLT ideally, would be at least double the size of the brewhouse. For example, if you’ve a 500-liter system, get a 1,000-liter HLT minimum.
Please note: There exists alternative options to have a 3-vessel system on a 2-tank footprint. These systems though have smaller HLT’s or use the brew kettle for heating water. Not ideal, as they make double brew days tough and LONG!
So, if you’re planning to scale up, to fill more 1,000-liter FV’s from a 500-liter brewhouse in the future, for example. A brewhouse with three dedicated brewhouse vessels and a larger HLT, makes a brewers life easier.
Furthermore, your brewhouse efficiencies will be better too. Yes, there are greater upfront costs but it’s still cheaper than trying to scale up at a later date. From a system already pushed to the max.
What Type of Heating? Small Brewery Equipment List
At 500-liters system can still have electric heating, but if a brewer wants the ability to step mash; electric steam generators are the preferred option in most instances.
This is an electric steam generator
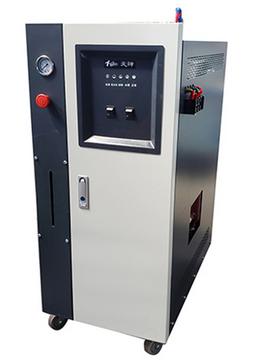
When oprating for steam, one must check a steam generator is allowed where the brewery building is situated. Some local laws depending on location, might not allow a steam generator or you’ll need to have a low pressure one.
Honestly depending on needs, future plans and available space; a two-vessel system for a brew length between 500 and 1,000-liters is adequate. You can still double brew in a day, but it may take 11-hours.
If you want to discuss options available in more detail, then please feel free to reach out me at:info@alstonbrew.com
One final note: Most systems come with a brewhouse platform as standard (if needed). However, please check with your equipment manufacturer. The brewing platform should be included and listed in any quotation provided.
Small Brewery Equipment List – Checking Brewhouse Vessel Volumes
When you want to check your brewhouse volumes. I mean, know how much liquid is in the mash tun (water volume) or kettle (wort volume). You have three options:
- Use a dipstick provided by the equipment supplier
- Have sight glasses (usually plastic or glass tubes) with graduated volumes levels visible.
- Inline flowmeters
This is the Chinese made flowmeter we have for a pilot system – works with low flow rates
On small systems, options one or two are typically chosen. I like having both a dipstick and sight glass for my mash/lauter tun. I use the dipstick to measure the water added to the mash tun.
With smaller systems, you generally put all the water in the mash tun first, then add the malt to it. Having a sight glass on the mash/lauter tun, allows a brewer to see how much liquid is in the vessel as you’re collecting the wort to the kettle during the lauter.
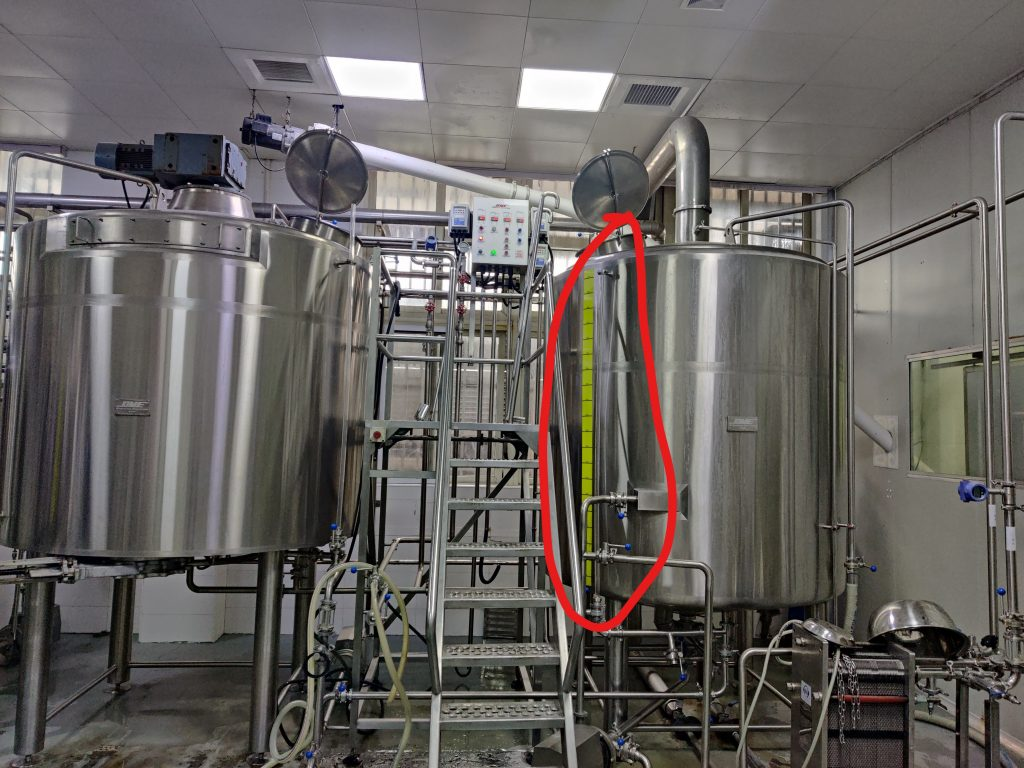
On the big system you can see the sight glass and graduated volume level reader, ringed in red
It helps a brewer reduce the chances of running the mash/lauter tun dry thus causing the mash bed to collapse. On the kettle, I like having a sight glass, but happy to use a dipstick too.
Flow meters are expensive and not strictly necessary on small systems. Furthermore, with smaller system, often the collection of wort to the kettle is too slow for a normal flowmeter to work properly.
VFD Controls for Brewhouse Pumps
When controlling the collection speed of the wort to the kettle, it’s nice to have a VFD (variable frequency drive) control for the lauter pump. It can be simple as turning a knob on a manual control panel, to control the speed.
An example of a variable control switch which can be used to control a brewhouse pumps speed
Having this function, allows a brewer fine control of the speed of the wort being collected to the kettle. Once a brewer becomes familiar with the system, it allows them to collect the wort with confidence every brew day.
So, a brewer can then do other things (like cellaring tasks), without needing to watch the collection all the time. Furthermore, you want to take your time collecting wort to the brew kettle.
Ideally, you’ll collect the wort over a 90-minutes period, for decent brewhouse efficiencies. This is just a guide, with each brewery being different.
When it comes to collecting wort from the kettle/whirlpool to the fermentation vessel (FV), you need to control the temperature of the wort.
You don’t need to a VFD control here. Instead, a brewer can use manual valves to control the speed of the wort to FV or the cold water/glycol used for cooling. Either option allows the wort to be collected at the target temperature.
Auxiliary Brewhouse Additions – Small Brewery Equipment List
There are a few extras I like to have, for the brewhouse. These are:
Hop strainer
Having a hop strainer after the whirlpool and before the heat exchanger offers extra protection, to ensure no hop materials or other solids make it to the heat exchanger.
The housing for the strainer before the heat exchangerCan take off the handle of the strainer for easier cleaningStrainer being taken out of the housingOur Hop Strainer for the Big System
You want to keep your heat exchanger clean, as they are a big source of potential infection. Plus, any solids in the heat exchanger, makes it less efficient too.
You want a hop strainer which can be isolated and taken out . So, if it becomes blocked; it can be removed, cleaned and then put it back in place.
Aeration Assembly
A brewer needs to be able to add pure oxygen to the wort as it’s being collected to the FV. Having an aeration assembly after the heat exchanger is ideal.
It’s usually an aeration stone with microscopic-holes in it. Which allows oxygen to be absorbed into the wort, as makes its way to the FV.
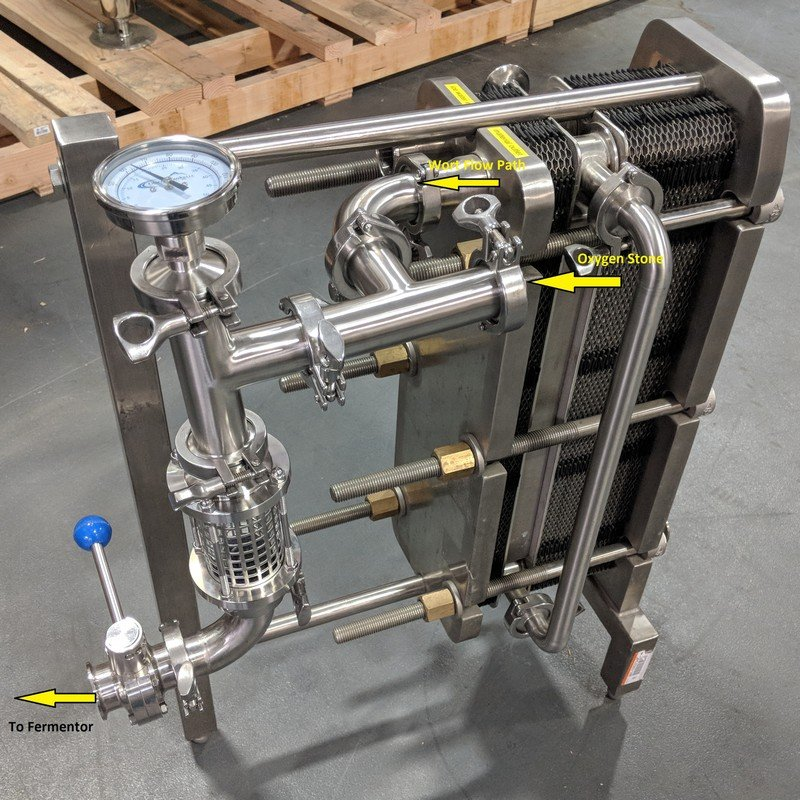
An example of an brewery aeration assembly unit
Furthermore, if you do use oxygen. I’d recommend getting a flowmeter which is connected to your oxygen bottle. So, the amount of oxygen being used can be measured.
They aren’t expensive, and it’s better than doing by eye, giving a brewer more control. The one pictured below is actually meant for medical use. However, in China, we often use them in brewing too.
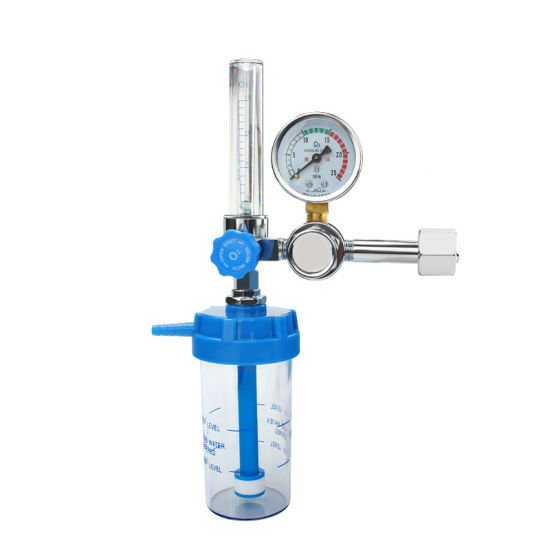
This really meant for medical use but can be used in brewing
Sample Point
Having a sample point after the heat exchanger is nice for taking wort gravities and pH. Ideally though, a brewer takes a sample at the end of or in the last few minutes of the boil to check gravity and wort pH.
As then the boil can then be extended, if the gravity is too low. Or water added if the gravity is too high.
Heat Exchanger – Small Brewery Equipment List
There are three main options, when it comes to choosing a heat exchanger:
- Single stage heat exchanger – Using glycol only.
- Two-stage heat exchanger – Using glycol and mains water
- One stage heat exchanger using cold water (from mains or CLT [cold water tank])
The choice is down to personal preference. I’ve seen all option used. This subject is quite hard to write about in detail. As the right option is based on individual circumstances.
It’d take a whole article to explain which option is best, for each possible circumstance. So as before, please reach out to me, if you want to discuss this subject or other system needs in more detail.
Steam Condenser – Small Brewery Equipment List
When you boil wort in the kettle, you inevitably make steam. You don’t really want this steam “fogging up” your brewhouse. With a very small system, a brewer is probably OK without a condenser, as the steam produced is manageable.
You do need to keep your kettle manway open during boiling for allowing the steam to escape (if you don’t have a flue, chimney or condenser).
Still, I like to have condenser if possible. But, if costs are tight, it’s piece of equipment a brewer might be able to do without.
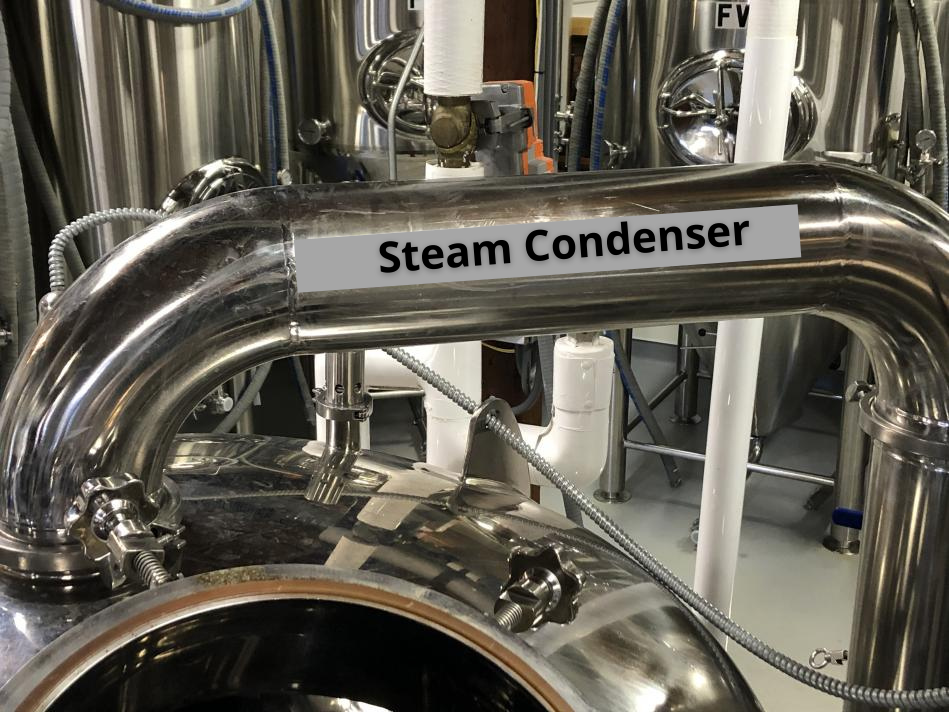
The steam is cooled by water and goes to the drain
On larger system especially, anything over 500-liters. I’d recommended having a steam condenser fitted to the brew kettle. These condensers use mains water to cool the steam down, turning it into water, which then goes to the drain.
Hot-Water and Cold-Water Tanks
This comes down to space, I do like to have a HLT if possible. You can heat up the water in the tank the day before. Or have a timer to heat the water overnight so, it ready for the brew day.
If you’re looking to double brew now, or in the future then having a tank which twice the size of the brewhouse is ideal.
If you’re planning to stick to single brews, housing a smaller HLT is feasible. Ideally, I’d have the HLT, at least the size of the brew length.
So, there’s water for cleaning (kegs and CIP’s) too. With a smaller HLT a brewer will need to top up and heat the HLT during the day.
Water Mixing Station
A water mixing station is used to control the mash and sparge water temperature. If the hot liquor from the HLT is too hot, the water mixing station allows for cold water to be added cooling it down.
So, the desired water temperature needed for the brew can be hit. With a smaller system, it’s not needed. A brewer can heat the water in the HLT to the desired water temperature for mashing in. Then during the mash stand, top up and heat the water so, it’s the correct temp for lautering.
Post time: Apr-19-2022